From Recliner to Remembering
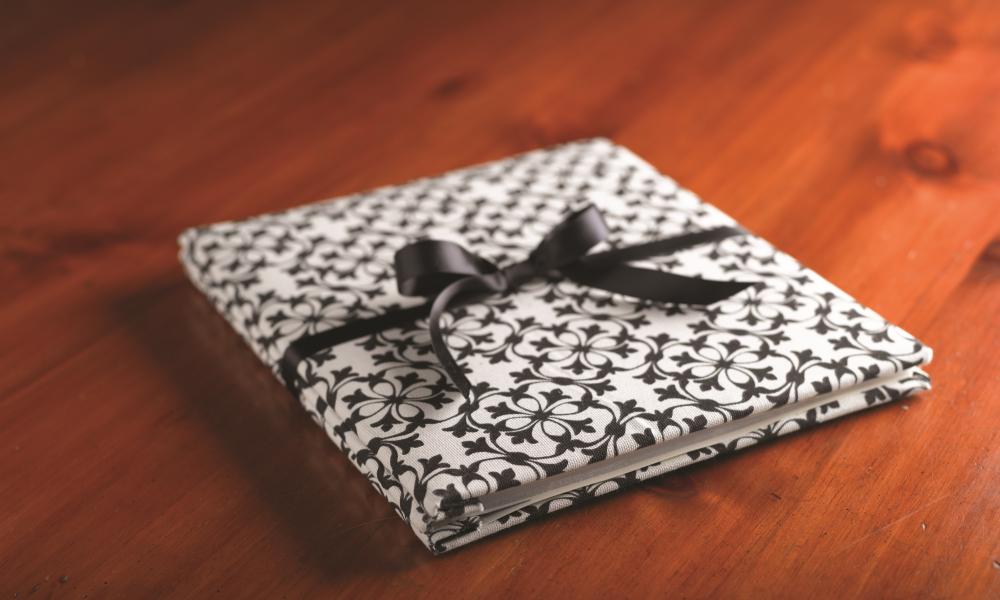
A keepsake photo album
A keepsake photo album
Let’s face it, a reclining chair is a man’s greatest treasure. There’s just no parting with it, no matter how ugly, old and beat-up it is. And if it has any ounce of sentimental value, you can forget about him ever wanting to part with it. I know this firsthand, since I have one in my house (a chair that is, not a man; well – actually I have both).
Allow me to describe. There are two types of distressed leather chairs – the intentionally distressed ones you see in a popular catalogue; and the other ones that look like a chew toy for a pit bull. Unfortunately, ours is the latter. I cannot say that it is overstuffed, since the stuffing has, well, fallen out. Even worse, it comes with an ottoman, which serves no purpose other than a place for my 3-year old son to hide his toys (in its many holes).
My husband sees the chair differently. For him, it’s a little beat up, but so what? It’s comfortable, has character and most important, has sentimental value. You see, it was his father’s chair before we inherited it. My husband and all his siblings were told stories by their dad in that chair. They were scolded in that chair, studied in it, slept in it and played in it using their imaginations to transform it into things that ranged from battleships to medieval castles.
Mostly, what my husband loves about the chair is attached to the many moments of formation and lessons that his father spent with him as a child. And as a mom who cares, I acknowledge that the best religious education and formation start at home. I do believe we, as parents, have a responsibility to model, reinforce and teach the virtues and habits that build character and please God. Love or hate the chair, I respect my husband’s feelings and secretly hope one day my kids will have similar “keepsakes” that serve as symbols of our role as parents.
So what about that dilapidated chair and ottoman today? I convinced my husband that at least the ottoman had to go to the curb. It really looked as if it had been dropped from a skyscraper. But he wasn’t going to let go of it that easily. Rather than toss it outright, he found a way to give new life to the sad, old, tattered thing.
With my father-in-law’s 75th birthday nearing, my husband skinned the old ottoman the day before trash day. Like a triumphant hunter over his felled 12-point buck, he went to work on its hide, salvaging whatever pieces of un-torn leather that he could. He then collected a bunch of pictures of his dad from over the years and grouped them according to various memories and moments. The final, completed photo album then received its new cover – brown leather from the expired ottoman. In this sense, my husband gave new life to the old furniture. Its spirit lives on, in my husband’s mind, in the photo album that now adorns my father-in-law’s bookshelf.
As for the chair, hopefully I can convince him to make a few more leather bound albums to give to family or keep for ourselves.
Do you have an old piece of furniture or article of clothing that should be thrown away, but evokes too much sentiment to part with? Here’s something you can do to give it new life.
Keepsake album cover
Supplies:
• Any sentimental textiles of your choice (leather, upholstery, etc.)
• Two large (12” x12”) pieces of cardstock
• Photo album with removable screws or scrapbook album
• Sharp scissors
• Ruler
• Marker
• Craft knife
• Spray adhesive
• Glue gun
1. Take apart photo album or scrapbook. Cut the fabric/textile for each (front and back) cover, measuring 1 ½ inches bigger around all sides. Cut enough fabric/textile to cover spine of album. Set aside.
2. In a well-ventilated area, spray a light coating of adhesive on front and back covers of album and the spine. Center and adhere both covers on backside of each piece of fabric/textile. Flip over. Press and smooth fabric/textile until it’s completely intact. Adhere remaining piece to front of spine. Set aside.
3. Flip front and back covers over again. Place a bead of hot glue to four corners of fabric. Working quickly (so glue doesn’t harden) fold the glued fabric over the corners of the inside of album (making a 90 degree angle). Make a glue line on top, bottom, right and left side of both covers and fold fabric over, making a tight fit.
4. Trim each piece of cardstock 1/8-inch smaller than inside of front and back covers. With glue gun, adhere to inside of front and back covers to give it a finished look.
5. Using the point of a craft knife, cut slits into the fabric covering the screw holes. Carefully put the album back together.